It seems that you are craving to quicken your stitching. We appreciate your endeavor. Speed should matter to your craftsmanship. Why?
The more you quicken, the more you create. Simple. It is not only necessary for commercial production but also for individual work.
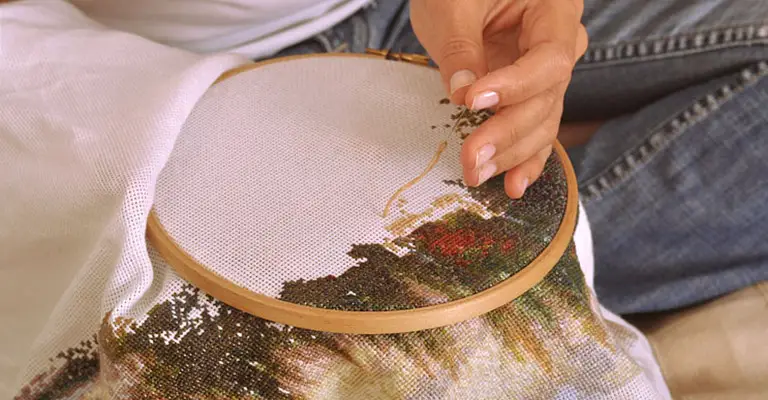
Indeed, cross stitch is not a battlefield. Everyone develops in a distinct way. Nonetheless, if you can master the skill to create fantastic things faster, you will be enjoying your job more and more!
How to Cross Stitch Faster – Make Yourself Master on It
Are you ready to speed up your cross-stitching? Then it would help best if you go through the entire post. This article includes the best resources in this regard! Here we will be talking about the ways and means vividly. Eat them at once!
Be Organized
It would help best if you organize yourself before all. How? You had better start with preparing your stitching kit and materials. When you have the intended thread color, right needle, and so on, you can save an amount of time and speed up your cross-stitching.
Therefore, gather your thread, needles, scissors, and other tools first. When they are in a single place, there is no chance of wasting time! That means ensuring things in advance in such a way will help you run faster for sure.
Have Your Analysis
The analysis of a project is not only for experts but for you also. It will be wise to analyze before you begin stitching. For this, you have to have a clear understanding of your crafting project. And more importantly, you need to plan your approach.
Let’s say you managed several different colors to apply in the work. Then you will have to determine how you will switch from one to another. And it would be best if you use a single color in a large area. It will help you finish faster.
Employ A Hoop
Are you yet to get accustomed to a hoop while stitching? Oh dear, you made a mistake! You are simply missing a chance to skyrocket your stitching. Imagine you are on a foreign land tour and ignoring a guide.
A hoop will tremendously help you manipulate the fabric. There are hoops of different materials. Choose whatever suits you. For example, you can go for a wooden hoop. In that case, you will have to adjust that using a screw at the top. Have a look at the picture below!
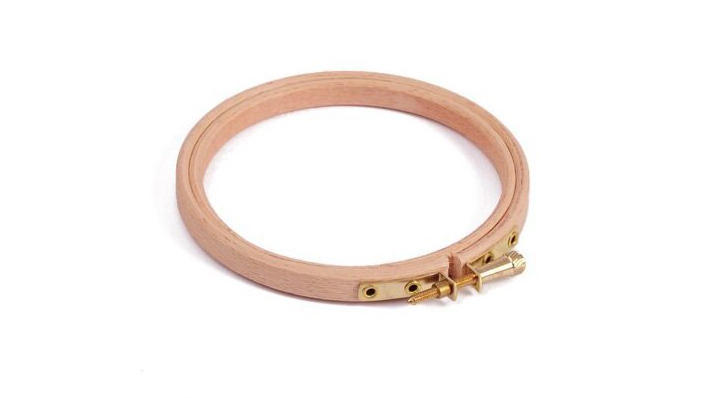
Alternatively, you can use an embroidery hoop. What are the benefits? Well, you can retain your piece of cloth with a chosen amount of tension. Also, such a hoop allows you to save time by giving a good starting point.
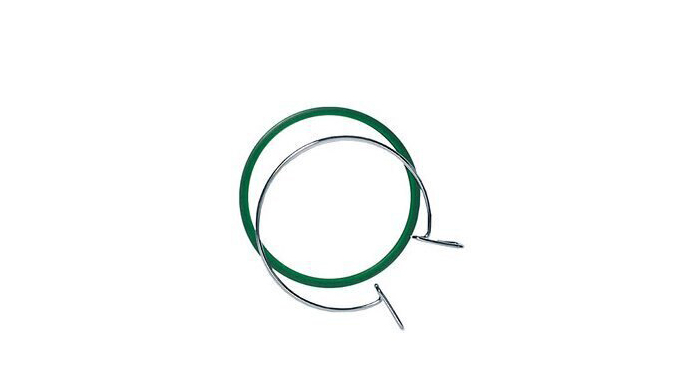
The picture shows a Groves Spring Hoop. You will find it easy to pinch open and closed.
And do you know what an ideal hoop is? It should be easily removable from the fabric, no matter if it is made of plastic or wood. You will find a wide range of sizes. For instance, a 12-inch hoop is an aptly sized hoop to work on big projects. On the other hand, tiny hoops such as Dandelyne are also available waving at you for your small project!
Prioritize Danish Stitching Over Victorian Stitching
Traditionally, we have got two ways to cross-stitch. These are –
- Victorian Stitching or English Stitching and
- Danish Stitching
Allow us to define them in brief!
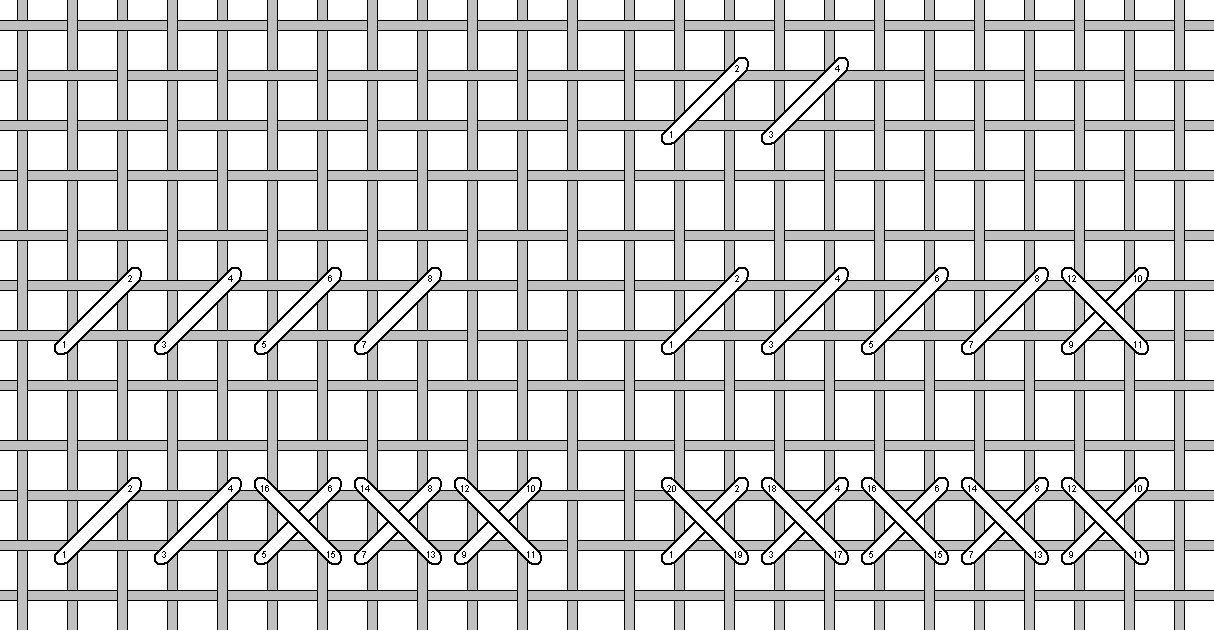
Before moving on to the next, you accomplish one full cross stitch in Victorian or English stitching. This stitching technique is the ideal technique to work with variegated threads. And the variegated thread you will use to showcase the full effect of the floss.
On the other hand, in Danish stitching, you need to fulfill one leg in one direction and then get back to complete the entire cross stitch. And it is the most suitable way to learn for beginners.
Benefit from the Sewing Method of Cross Stitch
Let us assume that you will stitch without a hoop. Then you will get the advantage of your fabric’s flexibility. That means you can easily flex your fabric to stitch through two holes simultaneously! It will reduce the number of your moves and help you blast through smaller pieces. As a result, you can come up with your desired work quickly.
However, if you want a clean and calculated shot, you better use a frame or hoop.
Stop Flipping Your Work
Yeah, we admit that occasionally flipping helps ensure knot-free work. However, if you get accustomed to it, you will be slower and slower in your stitching.
In the beginning, you may rely on this. But please try your best not to be used to it. And hey, no worries about finding the correct position to stick the needle. The continuous effort will help you develop muscle memory. You will wonder about your development!
Consequently, you will not have to look at the back of your project. And you will be able to position your hands and find the right spot.
Use Double-Sided Needle
It will additionally help if you use a double-sided or twin-pointed needle. It is indeed a clever technique to achieve the two-hand tactic! What is it?
It is a standard needle to knit small things in the round. Here you don’t need to swing around that eats additional time.

Ensure Other Equipment Are Okay
Apart from the hoop and needle, make sure other necessary pieces of equipment are there in advance. While working, when you search for these and that, you merely waste your time! So it would help best to ensure that you have the right hoop, scissors, frame, and needle in your arsenal before you start stitching.
Scissors
They must be sharp enough so that you can quicken your stitching. And most importantly, get one of the best cross stitch scissors for you. Here we present a reliable list of scissors.
The All-Purpose Thread Snipper:
- Premax Carnival Embroidery Scissors
- Double Curved Sewing Machine Scissors
The Speciality Thread Snipper:
- Sodial Metal Grip Shears
- Premax 4″ Weavers Scissors
- Canary Mini Snips
The Fabric Cutter:
- Fiskars Fabric Scissors
The Plastic Canvas/Waste Canvas Cutter:
- Fiskars RazorEdge Soft Grip Scissors
- X-acto Z Series Number 1 Knife
Frame
The frame needs to be consistent with the fabric size. Let us share some excellent frame ideas with you. Please have a look at the names and images along with their features below!
Easy Clip Frames:
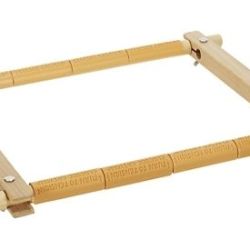
These are the best fit for large or extra-large craft projects. You will find a number of sizes of easy clip frames. Such a frame can be an apt choice for long-term price investment. However, it is a bit heavy. So it might be problematic to hold on for a long time.
Bar Frames:
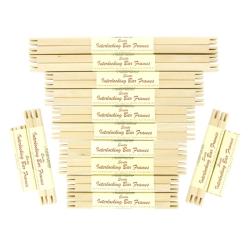
It will be a cost-effective option for you for sure! It is cheaper than the other reliable ones. However, it is not suitable for large pieces and is quite heavy.
Scroll Frames:
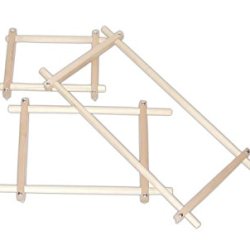
Anyone moving on from a hoop will find the scroll frame pretty handy. It allows you to stitch to your heart’s content. However, these frames are weighty and quite expensive.
Grip-or-Clip:
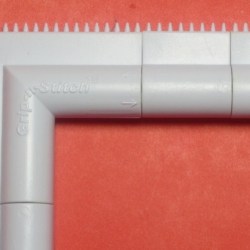
You may regard this as a combination of all the frames above. Such a superframe will help complete your cross-stitching project faster. No doubt, this uncommon frame type will be apt for small or medium pieces. However, it takes additional time to set up.
Universal Craft Frame:
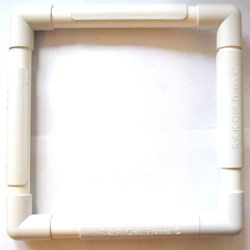
You can buy kits to make such a frame on your own. These are affordable, light, and ideal for small and medium pieces. Nonetheless, it is not able to “hold” stitch, and you cannot rely on it for larger projects.
Railroading
You can apply this method to complete a cross-stitch project faster. In this technique, you need to keep both strands of floss parallel at the time of stitching. Place the larger needle underneath the floss and start stitching. Here you don’t need to invest too much time to monitor threads’ going and correct the stitches.
Thus, you can save a great amount of time and create nice-looking shots!
Sewing Method
It is an in-hand technique of stitching. Here you do not need to poke your needle through one hole. Instead, you will use one motion to make your half stitches. It is called the sewing method.
Get more of a drape for your fabric. It will let you weave through two holes. Thus you can stitch more in short as you can condense your movement.
For a better understanding, you may go through the clip below:
Utilize Two Hands
You need to process the needle through the fabric, right? Then employ both hands to do the job to get the best result. Let us show you the shuttle technique.
Have one hand on top and the other one on the bottom. With merely a swift pivot of the needle, it will pave the way to create short work of to and fro. It will ensure a substantial speed to your stitching. And it would help best if you choose a tool like John James Twin Pointed Quick Stitch Needle to succeed in this technique.
Choose the Fabric Type and Count
You will have various fabric types to choose from for your project such as –
- Aida
- Linen
- Evenweave
- Hardanger
- Waste Canvas
- Plastic Canvas
However, all the types will not help you accomplish faster. Do you want to know about the most suitable one? Then embrace Aida.
Besides, the count will provide you with a supersonic speed in stitching. So it would be best if you use a larger count for that!
Ensure The Apt Thread Length
Why do you merely have to cut your strands of thread? Why do you cut to the length of your forearm and not more than that? It is because you utilize your elbow as a pivot while stitching, and it helps you move the needle and thread.
Now think, do you want more stitches per minute? Then prefer smaller threads as they take the least time to pull through the fabric. And while stitching large areas of the identical color, let not the changing of threads engulf your time. In order to allow for waste knots, drag the strand to mere beyond your forearm’s length.
In such a settlement, your hand can maximize the output for sure!
Do Your Bottom Stitches Before All
Are you dealing with a specific color in a given area? Then do all the bottom stitches before all. By this, you will be free from referring to the design to finish the stitches. You can regain the time you spend ensuring the correctness of bottom stitches, no matter if the area is complex.
Learn How to Park Your Threads
Let’s say you are dealing with a piece of several colors-based designs. Or imagine that it comprises a lot of confetti that means individual stitches of a single color. In such a case, you can save a significant amount of time. How?
Well, you need to know how to park your threads. For this, you must have completed an area of one color first. Then drag the thread through a hole closer to the portion. It will secure the back thread. Yes, you will need to reuse the color. In that case, after threading your needle, pull the strand back through from the top and go on. That’s it!
You may also have a look at the clip below.
Think of Partial Stitches
Most stitchers indeed prefer half cross stitch. But you can benefit from partial stitches too. Here you can achieve the same effect twice the time.
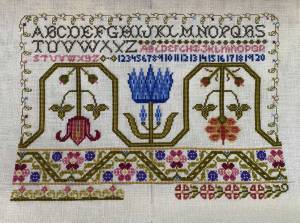
However, half cross stitch is the best means to showcase the stitch color. Also, it provides you with some nice shadowing effects.
Use a Stand
Ask all the stitchers experienced in using a stand at the time of their stitching. They will definitely share with you a positive realization regarding this. It superbly helps hold the work. For example, a lap stand can befriend your project well. Alternatively, you can go for a floor-standing frame. It will not only speed up the stitching but also improve your posture. Allow us to explain how.
Both of them have distinct benefits. While using a lap stand or seat frame, you will have to sit on the paddle. This posture stabilizes the upright arm. And it would help if you use it sitting on a sofa. Else, you can utilize a table.
On the other hand, a floor-standing frame comprises one or two legs. You will find it a better stabilizer in the long run.
Look at the Tension
There is a close relationship between the tension of your floss and your finger. Your finger speed is dependent on that. Mistakenly, many stitchers put lots of pressure on holding the needle. As a result, that sort of project lacks flexibility and eats valuable time.
So it would help best if you hold your needle and floss without putting much pressure. If you relax your arm and lose the floss, you will gain.
Listen to Music
One may wonder, but it is a fact that listening to music energizes you and helps accomplish a project faster. A TV screen can snatch your attention, but music will always be helpful. Music has a rhythm that makes you cheerful and does not let you down. It stimulates the brain. And this way, it helps quicken the work.
So please do not miss your earphone while stitching anymore. It is as amusing as beneficial.
Prepare Your Space
A thoughtfully arranged space is also helpful for speeding up the stitching. So it will be wise to have the threads, needles, and other necessary tools in close proximity. If you ensure such a settlement, you will save enormous time.
Along with that, try to manage a bobbin box and bobbins to get your threads in numerical order. It will save you from potential frustration that generally occurs in the middle of a project. Plus, have a cross-stitch chart. It will provide you with a thread list and quicken your stitching.
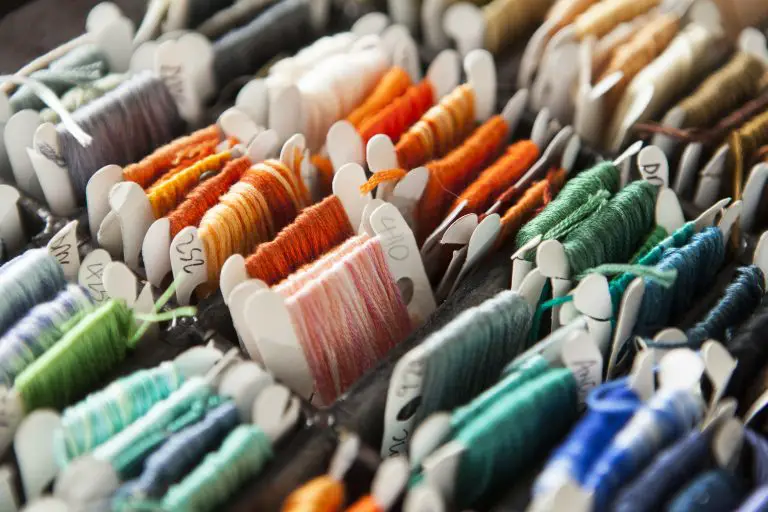
Else, you may prioritize having your floor standing frame featuring a flexible arm with clamps. We are talking about the arm that has clamps on either end. Such stuff will help you position your chart at eye level. You can monitor what you are doing. Thus, it will quicken the whole task.

Besides, you can use Sugru and magnets. It leverages your scissors and other necessary tools to stick to the apt places.
Ensure Ergonomic Workspace
There is something more through which you can improve your working environment. Especially, when you have lots of due stitching. Don’t you crave an ergonomically sound workplace? Quite sure you do! Then it will be wise to come up with proper lighting. It is indeed a critical factor. Why?
If it needs and you ignore it, then be sure to suffer from headaches and eye strain. The more dangerous thing is- it has a long-term impact! So no matter if you are a professional or not, it would help best if you managed light and a stand to support your stitching position. Better think about its benefit as it helps quicken stitching.
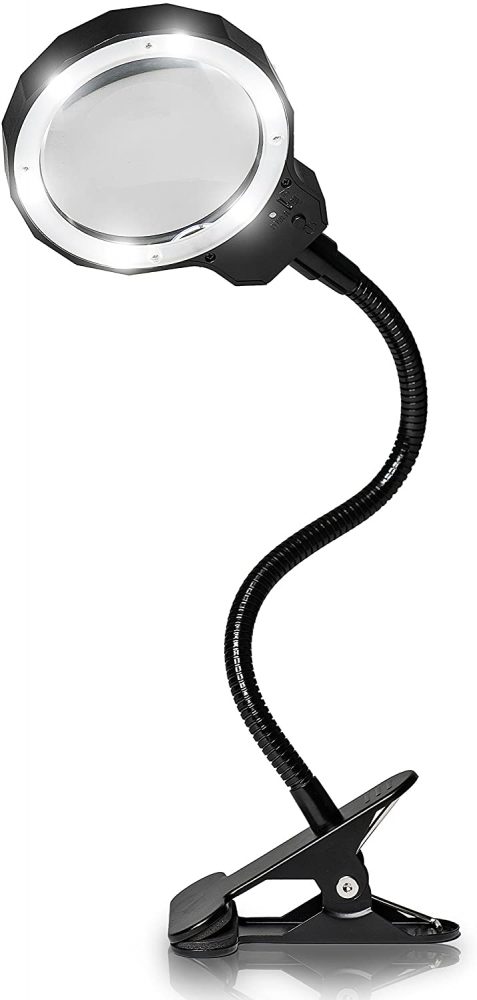
No worries, you will have many light manufacturers who could realize your need.
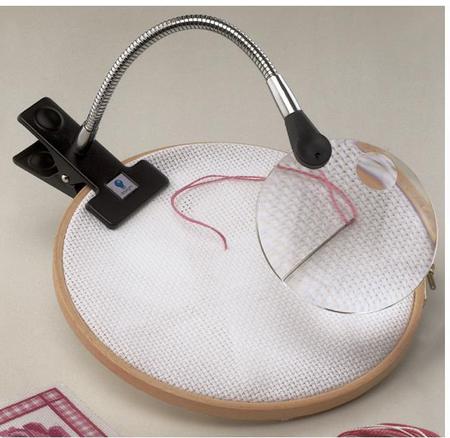
Apart from that, having a magnifying lamp is not a matter of shyness. It will ease your job. And the more you make it easier, the more you finish faster. It will help you outweigh any concern as you can see the holes in 32 ct linen.
Frequently Asked Question
Question: Do you use a hoop for counted cross stitch?
Answer: In cross-stitching, though using a hoop is not as essential, you can create more stitches in hand embroidery employing this. It is superbly handy for new stitchers as it helps handle the fabric better.
Question: How can I make my cross stitch faster?
Answer: See the subheadings of the post above. The more you ensure, the faster you will be with your stitching project.
Question: Why do you start cross stitch in the middle?
Answer: It is absolutely wise to begin from the middle of a design. It ensures that your intended design is in the center. Thus, it reduces the hassle of repeating work and quickens your project.
Question: What does frogging mean in cross stitch?
Answer: In cross-stitching, frog or frogging is a common phenomenon. It is all about removing some of your stitches after making a mistake and repeating. Frogging hampers your working speed at the end of the day.
Question: What do 2 strands mean in cross stitch?
Answer: It denotes stitching with 2 strands of embroidery floss over 2 threads in the fabric. For this, before leaving the loop in the doubled floss, you have to place the cut ends through the needle. Afterward, grasp the loop and snug the stitch while going down.
Question: What does 14/16 count cross stitch mean?
Answer: The 14 count cross stitch means 14 holes or squares per inch, and the 16 count cross stitch means 16 holes or squares per inch of the fabric. So logically, the squares or ‘cross’ in the 14 count will be bigger than the 16 counts. The lowest Aida that you can have is 6 counts.
Question: What do 3 strands mean in cross stitch?
Answer: Stitching 3 over 3 means to stitch with 3 strands of embroidery floss over 2 threads in the fabric.
Question: What does Confetti mean in cross stitch?
Answer: Confetti is all about getting various colors in one area. Generally, it comes as a 10 by 10 square. In this pattern, stitches look like tiny bits of colored paper.
Question: How long does it take to do a full coverage cross stitch?
Answer: on average, if you work 86 stitches a day without changing the pace, experts estimate that you will have to work five years, eight months, three weeks, and two days to complete a pattern.
Question: How long should an embroidery thread be?
Answer: In embroidery, there is a standard working length. According to experts, the apt length for embroidery floss is 20 inches. And as a type of embroidery, the working length of a cross-stitch should be the same. Please do not let floss fuzz by using longer lengths whose ultimate result is nothing but fraying and breaking.
Question: What are the stamped cross stitch kits?
Answer: You will have stamped cross stitch kits to get super support in stitching. These help you mark your fabric with different symbols. It is an all-inclusive cross stitch kit. Moreover, the instructions are simple and easy. These expedite a craft project.
To Wrap Up
Hopefully, you did not think of this guide on the cross stitch merely for beginners. The reality is- it will be equally helpful for the experienced also. In stitching, quickening is excelling. However, you should not compromise quality at any cost. After all, it is an art.
Have a good day!
Leave a Reply