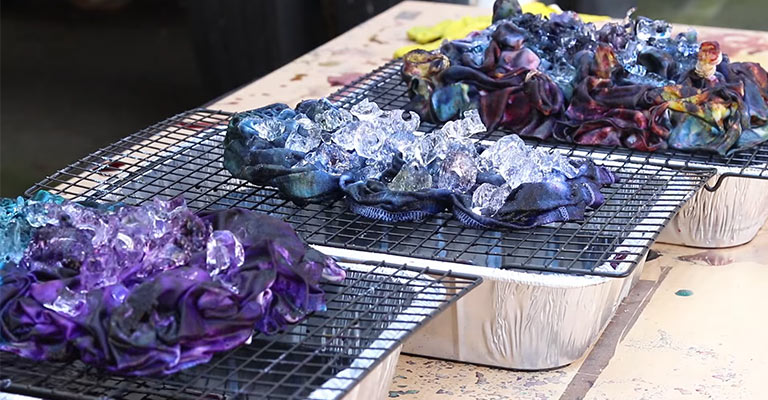
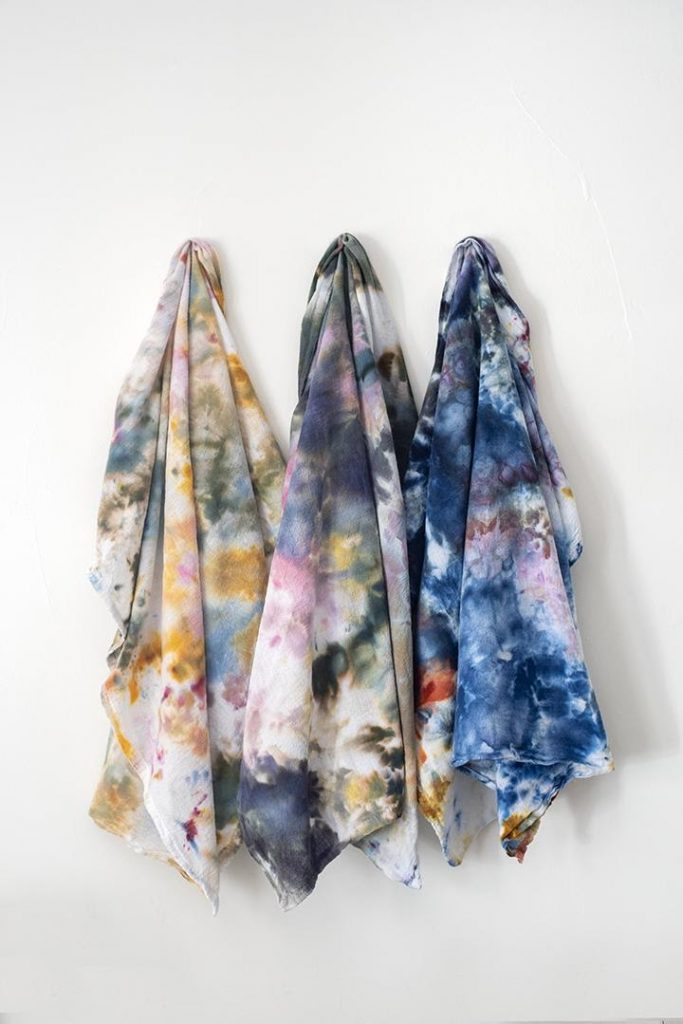
Something is outstanding about making hand-dyed fabric at home and for your home. The unique touch to a simple fabric can add extra personality and amusement to any space. All you have to do is sprinkle some powdered dye on ice on the pick of the fabric to create that amazing watercolor texture.
How to Ice Dye Fabric
The process of ice dying a piece of fabric is not only interesting but also very much fun. Once you get familiar with this, you can’t get enough of it. You’ll surely get amazed at the results.
Tie dye, Ice dyeing, is a hot new method for making multi-colored, patterned fabrics. My first experience with ice dyeing came a few weeks ago, and I am hooked! This fabric dyeing technique is so fun and I love bright colors.
There are no worries of ruining anything because these asymmetrical color stains are in style. Gather some elements that are present in everyone’s house and start. The only thing that you may need to purchase is some powdered dyes. You can use a single dye color or use several dye colors to give your plain, monotonous piece of fabric a vibrant look.

Before jumping on the steps there are some things you should look at first. Every process needs some materials. This is not exceptional as well. The things you’ll need to collect-
- soda ash solution or synthrapol
- bag of ice; little ice cubes
- Any suitable fabric
- procion dye or powder dye
- a plastic dish tub
- dish rack or drying rack
- glass measuring cup
- metal spoon
- dust mask
- rubber gloves
Usually, it’s suggested to get a metal spoon so that not a piece of dye gets spoiled or absorbed. When it comes to fabrics, all fabrics are not recommended for this work. Natural fabrics such as linen, cotton, wool, ramie, silk are better for ice dyeing. Rayon and nylon are also suitable. Other fabrics may not provide the perfect finished output.
Describe the Process Step by Step With Necessary Pictures and Links
It would be better if you put on hand gloves, wrap the place where you’ll conduct the process with a plastic cover, and keep a towel beside you to prevent any unwanted spills. Here are the steps you have to follow to ice dye your piece of fabric.
Step 1: Wash the fabric
The first part is washing the fabric you’ll use properly so that it doesn’t have any prominent stains on it. Take a big bucket or pan. Add one of the soda ash with a gallon of water. The proportions may need to be adjusted according to the size of the fabric you’re using.
Mix them together until the soda ash gets completely dissolved. Submerge the fabric into the solution fully and wait for at least 15 minutes. Within this time the fabric should soak the solution fully. This step may seem unimportant but actually, it’s very much important to get a pretty good result.

The solution assists the activation of the color with the raw fibers of the fabric. It helps to fix the dyes. After the fabric gets fully soaked and time passes, wring out the excess solutions from it.
Step 2: Gather the ice pieces on the fabric
After taking the fabric out of the bucket or pan, empty the plastic tub. Put a dish rack on it. Now place the fabric on the dish rack. The fabric has to fit the rack completely. The more twists and turn you’ll give the fabric, the more complicated and interesting the design will be.

Now take a glass measuring cup and fill it with ice pieces. In this way cover the fabric with ices completely. You should give as much ice as possible to fill the fabric. The amount of ice will determine the intensity of colors on your fabric.
Step 3: Sprinkle powdered dye
In this step, as mentioned before there’s no limited amount of how many colors you can use. Also, to choose a shade, remember that any dye that’ll pass from the ice to the fabric will become darker.
Take a metal spoon. Open the dye cans and take the powdered dyes. Carefully sprinkle this fiber reactive dye powder on the ice pieces. Try to sprinkle all over the surface.

If you want to use multiple colors, sprinkle the colors one by one in different areas of the ice surface. you’ll see as soon as you sprinkle dyes on the ice, it will start to melt beautifully. It may seem tempting but you have to wait.
Step 4: Set the dye
Wait for a day to let the fabric absorb the dye completely. Then, it’s highly recommendable to heat the fabric to set the dye fully. This part is optional but following it will give you the smoothest result. For this, you should add ColorStay Dye fixative, plastic wrap the fabric, and seal the corners.
Now wrap this piece with a paper towel and place it in the microwave. Heat it for 2 minutes. You’ll see the plastic puffing up creating a heat chamber. This chamber will help the dye bond with the fabric.
Once it’s done, take out the fabric, unwrap the plastic and keep it to be cooled. You can follow the process of keeping the fabric in an open place as well if that place gets enough sun heat and light. Keep the wrapped fabric there at least for an hour.
Finally, rinse the piece of fabric in cold water until the water gets clear. It’s to resist any unabsorbed dye from running into white sections. After that, wash the fabric with a mild detergent in cold water to set the dye even more. Let it dry and your ice-dyed fabric is ready.

Frequently Asked Questions
Can I use liquid dye instead of dye powder to ice dye my fabric?
Yes, you can use liquid dye as well. But for this work, using powdered dye is recommendable as it sits on the ice surface properly and it’s easy to handle. For liquid dye, the process is the same except here you have to drip the liquid dye on the ice surface. Know about a different type of dye fabric here.
What is snow dyeing?
Basically, snow dyeing and ice dyeing are the same. A process that uses ice or snow to create fluid or marbled patterns is known as ice dyeing. As a result, a subtler and softer effect is achieved compared to traditional tie-dyeing.
In order to achieve this, the ice or snow needs to dissolve slowly so that the dye powders can move and blend smoothly.
Although ice dyeing is commonly done on fabric, it can be applied to any plant fiber, including yarn.
Conclusion
It’s funny how a stylish look can be created with some ice and dyes only. A little technicality and boom, you got what you wanted. We tried to cover all the steps and basic information you need to know for ice dying. Hopefully, you’ll be able to get an appealing output simply by following the orders.
Leave a Reply