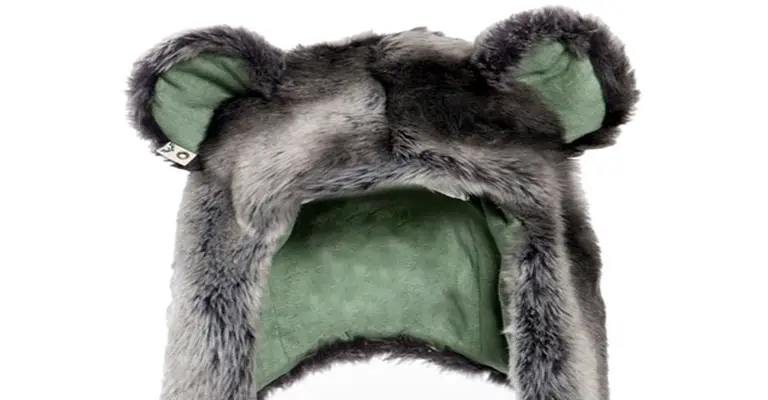
When you wear a SpiritHood, you transform. Your experience is unique and undefinable. There is faux fur on all hoods. Making your hood did not harm animals. “Hoods” are different from “Hats.” They are looser fitting than hats or beanie styles. Besides keeping your hood in place, they also double as a scarf that can be tied and untied for extra warmth. Do you want to know how to make a spirit hood? Here’s a short but practical guide to making your spirit hood.

A Step-by-Step Process of Making a Spirit Hood
The key to making a Spirit hoodie is creating a hood. It requires only a few simple measurements and seams to attach your Spirit hood to your favorite shirt. Match your Spirit hood with a bright, contrasting color. As part of this tutorial, you will learn how to make a Spirit hood.
Here are the items you will need:
- Scissors or an Exacto knife
- 3/8 yard of faux fur tip
- 3/8 yard of fabric for lining
- Needle & thread (matched to the liner fabric)
- Pins
- Optional: 1/2 yard of rope or chain
Step 1:
Finding fabric: In creating your hood, it is essential to select materials that contrast nicely with one another; bright colors or patterns provide an exciting lining and make them a little more unique from store-bought hoods.
Making the pattern: It’s best to trace the shape of a hood from the one you own and add 3” around all edges. You can make your bottom flaps as long or short as you like. Mine falls just below my shoulders. Sew them so the fur is down when they’re finished.
Cutting faux fur: You can use scissors with any fabric, which will work fine. Use a box cutter or an exact blade to cut the material if you wish to create a bit less of a mess.
Step 2:
Try it on after pinning the pieces together (you will need extra long pins to keep the fur together). If necessary, make adjustments.
Step 3:
Stitch the top/front and neck opening (over the top) of the two panels of the liner together. As for the faux fur, put them aside too. Keep both pieces inside while sewing along the front and the flaps at the bottom. Leave the back open.
Step 4:
If you wish to add ears to your hood, cut out two triangles of each fabric in any shape you desire (I chose obtuse triangles. However, round triangles may also be used, and the size is entirely your choice).
Make sure you sew each ear inside, including the fur and lining. It would help if you left the bottom open. Use pins to find out where you want them to attach to the hood, and connect them using a back stitch.
Step 5:
Turn the hood right-side-out and take 1/2 yard of chain or rope. If there is a small gap between the stitching and the bottom of the flap, you should use your fingers to work it through. After turning the hood inside out, ensure the bottom of the back/neck area is still open.
You should pull the chain or rope to get a good fit so there are a few inches inside the hood. The faux fur should be sewn with this on the inside. Make sure you do this on both sides. Now your hood looks super fly, and you won’t have to worry about it falling off.
Frequently Asked Questions (FAQs)
Is Spirit Hood Safe to Put in the Dryer?
The best thing you can do is not put faux fur in a clothes dryer with a heated setting. As a result of heat, fake fur fibers can melt, fuse, and become matted due to melting and fusing. It is impossible to reverse the damage that has already been done once it has occurred.
How Do I Keep Sprit Hood Soft?
How Do You Make Your Spirit Hood Smooth? Rather than using fabric softeners, make your mixture by combining 4 cups of water with two teaspoons of hair conditioner. After placing this homemade mixture in spray bottles, spritz your Sprit hood and brush lightly to make it smooth again.
Conclusion
You can sew the Sprit Hood with or without a sewing machine. There is no need to worry about the pattern or perfecting anything – any size or shape will work; it’s all about what you desire. It is always a wise idea to clean your sewing machine after working with faux fur. Skin sheds great lint to maintain stitch quality and prevent damaging the machine’s inner workings.
Leave a Reply