Searching the ways of making eye-dazzling wigs at home? Not a difficult task at all! What to do is just select the yarns and attach them to the hat in the following ways. Just have a look!

How to Make a Yarn Wig – Getting Started
This job is not so complex. To make fashionable and gorgeous wigs using yarn, you just need to follow these actions.
Needed Elements
- A winter hat (made of wool or crochet will be better) or a swimmer’s cap.
- Nearly one to two skeins of yarn (prefer the yarn having the same color of the hat).
- Crochet hook (a paper clip/small hook can also go).
- A double-knot
- Chalk/ Removable marker
- Scissors
- A pillow
- A little piece of cardboard
Collect these elements and start your job!
Match the Hat & Yarn
If your hat and yarn color don’t change, the hat will be visible from the gaps of yarn. So, try to keep both of their colors the same. If the hat and wig colors are the same, nobody will notice the gaps the yarn can’t cover.
Take Your Yarn
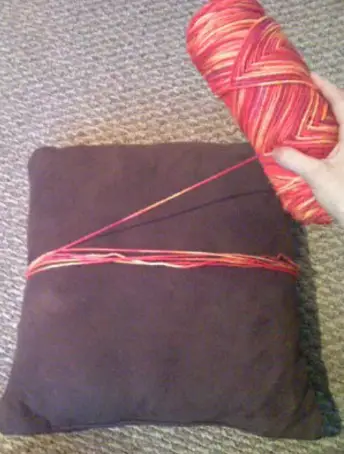
Make a wig that will reach the shoulders. So, first of all, take a pillow (should be of a standard size). Then around the width of the pillow (short width), wrap the skein of yarn nearly thirty times. Finish wrapping at that point from where you started.
Tie the Yarns Together
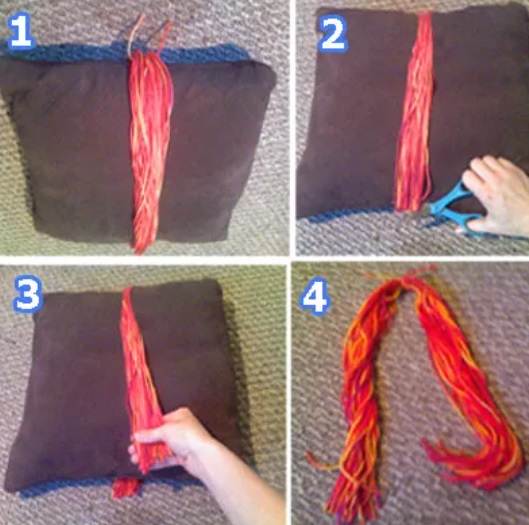
Tie all the yarns using a single piece of yarn. Notice that, one side of your pillow has the wrapping start and endpoint. Tie the hook on just the opposite side of the pillow. Now, on the other side of the pillow, cut the yarn. Tie the yarn so tightly. Now you will get a brunch of yarns that are fastened at their middle point.
Attach Yarns on Your Hat
Use the chalk and draw a line from the crown to the brim (top to bottom). Poke the crochet hook twice, through the right of the chalk line and then left of the chalk line. Now pull one end of the small piece of yarn that was used to tie the bundle and take it into the hat. Next, take its other end through the cap.

Tie Ends of Bundle Tie
After taking both of its two ends inside of your hat, tie them properly. You are suggested to use a double knot to secure.
Make Three More Bundles
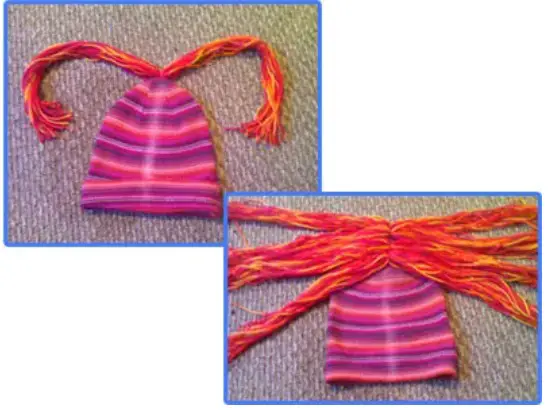
Repeat the way you attached the first bundle with your hat. You should fix three-mode bundles just below the first one the blue-colored circles of the picture), putting them nearly 5 inches apart. These bundles will be at the top position of your head.
Cut a Bundle of Bangs
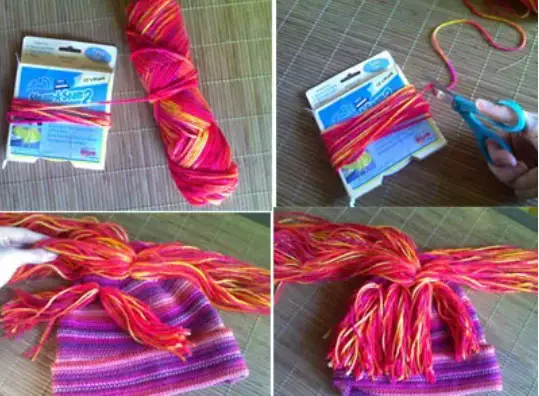
Take bangs of five to seven inches. You can use a little piece of cardboard to take the proper length of your bangs. If you want to make quite longer wigs, take 8-inch bangs.
Fix the Bangs
Set two sets of bangs at the right side of the chalk line and the other two seats on the left side of the line (just below the center bundles, green circles). All work on the front side of your yarn wig is done.
Fix Yarn at Back
Now, come to the back part of it. At this final step, attach the yarn of three bundles just at the back (yellow circles). Put them nearly 2-inch under the first bundle. Just under these three circles, put more two bundles of yarn. Try to put them on the slightly right and left sides of the three yellow bundles of the figure.
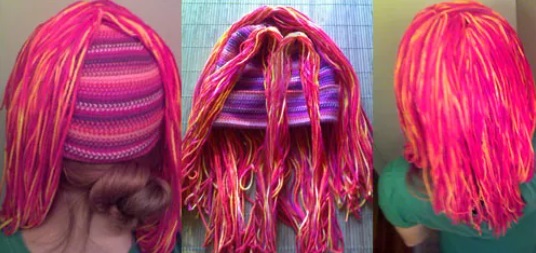
Finishing
Just a few more tasks are to be done. Cut your bangs and bundles or add some more, if you need. Now, try your wig and set the right coverage you need for further comfort. If you want to use a pigtail behind your pig, simply attach it just like the bundles. You can also check this article to learn to make yarn bracelets.
That’s all. Follow the actions step by step and make your wig.
FAQs
Q. Can I use any straightener on my yarn?
Ans: Yes, a hair straightener can be used on your yarn. But be careful using any iron as a straightener because it can burn up your yarn. Place the yarn on a solid board or any heat-proof surface before ironing. Before shooting steam, hang your yarn from a hook.
Q. How to wash a yarn wig?
Ans: It is common to find the wig dusty. so, if possible, make a dry wash. You can also clean by putting the wig into a stain pre-heater with water. A solution with hand-wash or non-toxic detergent can also be used. Use cold water and avoid using a washing machine. Softly wash using fingers and dry out properly for nearly a day.
Conclusion
People will give lots of suggestions and talk about thousands of ways of making a yarn wig. But they don’t work. You will find all the actions and complete guidelines here. Grab these and make a gorgeous wig at home.
Leave a Reply