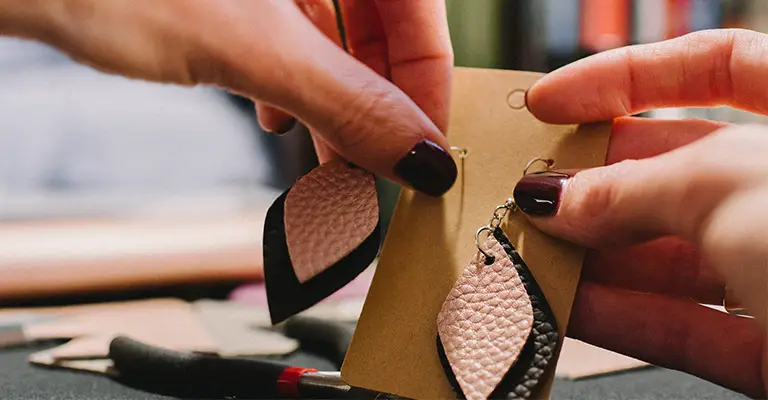
What is your take on the leather earring trend? It is easy to make and costs a fraction of the market price. To make a leather earring, the first step is to decide on the pattern and print it out. Then tracing and cutting the leather, punching holes, and attaching jump rings and earring hooks are the rest of the procedures.
How to Make Leather Earrings
Making faux leather earrings is an easy task anyone with a good design sense can do. Then all you have to do is to follow the right procedures. This section will cover those procedures in detail.

Step 1: Gather the Tools
To make a leather earring, you will need to gather multiple tools that are available at the nearest craft store. They include:
- a small piece of genuine leather
- Sharp scissors or a fine point blade
- A cutting mat
- earring hooks
- needle nose or jewelry pliers
- jump rings
- leather punch or a thumbtack
- and a sharpie
You can find leather easily in almost every fabric and craft store. As leather comes in so many different colors, choose according to your taste.
Getting a sharp scissor and a good pair of needle-nose pliers is important as well. If you don’t have a leather punch, you can do your work with a thumbtack. However, a leather punch makes the process really easy.
Step 2: Designing the Template and Printing It Out
The next step is to visualize how your Cricut faux leather earrings should look. You can either design it yourself or ask a designer to make designs for you.
There is another option to print out the presets. You can also find many different templates on the internet. Once the designing and printing are done, the whole process of making leather earrings starts pretty easily.
Step 3: Find An Appropriate Section and Trace It Out
The piece of leather you have got may have blemishes and discoloration at some places. You do not want that on your earrings. You want to get rid of that bad spot. Find yourself a good section of the leather piece to work with.
You are ready to get started once you have found the section you want. Cut out the template from the print sheet. Lay the leather piece down on the surface and put the template on it. Use a sharpie or a pen to trace the template around the leather.
Make sure you do not mark the side that you want facing outward. Place the shapes on the leather piece as close as possible. This will help you in getting more earrings out of your piece of leather.
Step 4: Start Cutting the Leather
This is the most important step to follow. Once you have marked out the design on your piece of leather, you start cutting it. (if you are being skeptical about the design, you use the popular teardrop shape)
Use a sharp scissor or a deep cut blade for doing so. If your scissor is not sharp, the cuts will not be smooth and the earrings will lose their desired shapes. Some of us used to use the Cricut machine, that’s also a good choice.
Take your time and consider cutting leather slow and steady. Cut faux leather right along the inside of the line that you have traced.
Step 5: Punch Holes in the Leather Earrings
Once you have finished cutting out your leather earrings, you have to punch holes in them. One way to do that is to use a leather punch. The tool is easy to find in local stores. Use the smallest setting for this step. However, if you do not own a leather punch, you can do it with a thumbtack or a sharp needle.
Locate a point that is close to the top and not too close to the edge. Punching a hole too close to the edge will result in an unbalanced weight. Make sure you punch holes in the same place on each leather earring.
Step 6: Attach the Jump Rings
Now that you are done with making holes, it is time to attach the jump rings. It is better to use special jewelry pliers to bend and attach a jump ring to the top of each leather earring. Or, you can use simple pliers to get the job done. You can even sometimes do the bending by your fingers depending on the material of the jump rings.
Step 7: Finish Making Your Earrings
In case you are making a basic flat-shaped earring, take another jump ring and connect the earring hook to the jump ring that is already attached to the leather. This is to stop the earrings from hanging sideways.
However, if you are making the pinched leather earrings, you do not need to attach that extra jump ring. All you have to do is just attach the earring hook directly to the original jump ring. That is how your leather earrings will be completed.
Frequently Asked Questions
How to prevent leather earrings from turning?
You can turn the earring hook loop sideways before connecting it to the leather shapes with a jump ring. You can also implement a very complex process which involves earring hooks, jump rings, and two pair of flat-nose pliers.
How can I smooth out the edges of the leather earrings?
You can smooth out the edges of the leather earrings by using a burnishing agent. Apply it with a toothpick along the edges. It will smooth out the leather and define the edges.
Conclusion
DIY leather earrings these days are extremely popular. Anyone can do it with the right tools at hand. This article covers the very basics and discusses them in a step-by-step process so that anyone without the knowledge can do it easily.
If you like to work with leather you may find this article beneficial.
Leave a Reply