Without the serger, to achieve the same result, use the zig-zag stitch or an overlock foot on your sewing machine. A Hong Kong or Bound seam may also serve the purpose. Just set the foot needed, fix the stitches, and start sewing!
Before going deep you need to know what does a serger do?
- Closes the seam allowance.
- Trims the extra fabric.
Sometimes people mistake thinking serging and binding are the same, here is an article to clarify the fact.
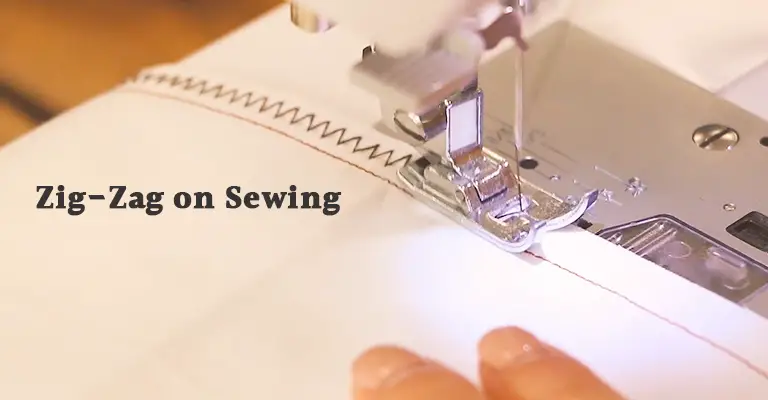
How Do I Serge Without a Serger Effectively
It is possible to finish raw edges without a serger by making zig-zag stitches. Here we used the Singer heavy-duty 4452 sewing machine.
Steps needed here:
1. Fix the Stitch Length
Rotate the knobs of the machine. Use stitch length 2 and a zig-zag stitch of width 5. Then run the machine and sew along the stitch.
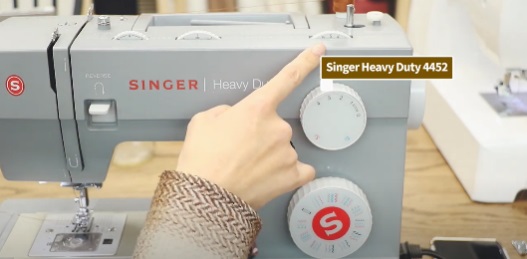
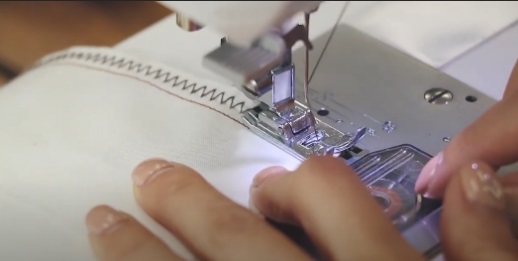
2. Make Zig-Zag Extra Secure
To keep the zig-zag stitch secured, make a straight stitch just over that. Cut off the extra fabric. Now your fabric is safe from fraying.
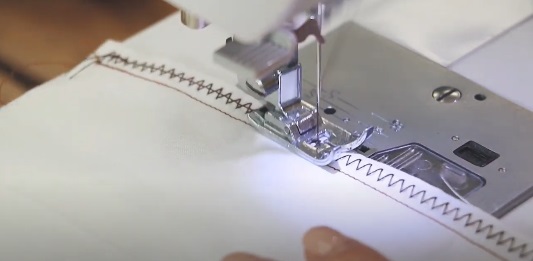
3. Using the Overcast Processor Foot
If you use the overcast processor foot, it has a little ridge to guide the fabric. So that you can sew along the raw edge of the fabric.
It makes a nice overcasting stitch! We have used here the basic sewing machine.
4. Set the Overcast Foot
Fix the overcast processor foot just below the sewing needle. Make sure more thread can be guided through the foot.
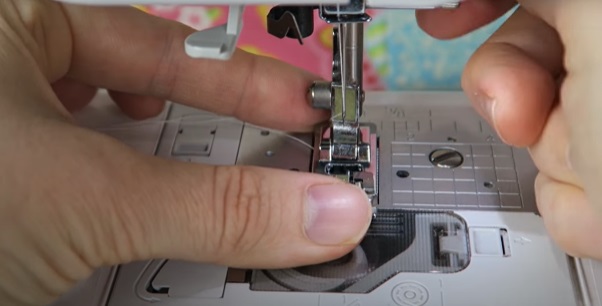
5. Set Stitch Number Then
Now start sewing. Set the stitch number 7.

6. Make Stitching
Just guide the raw edge of the fabric under the foot. Align your fabric along with the foot extension. Sew a stitch on the edge. Make sure the fabric is not slipping away. Now try stitch number 6. And do the same thing on the other side of the fabric.
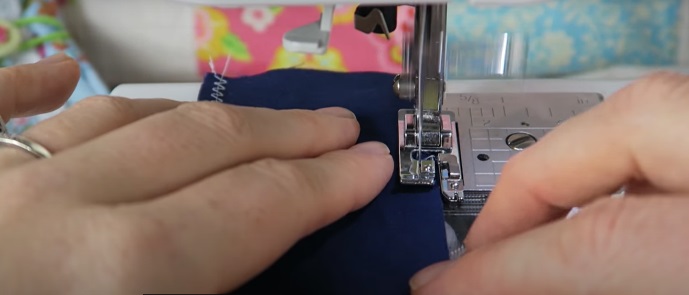
So, if you have a basic sewing machine, it should not be a problem to serge!
How to Overlock Without a Serger
- Take a regular sewing machine.
- Choose your stitch from the different stitching options.
- Use the foot that came with the machine. Better to try zig-zag foot here.
- Take a hood that is wide enough. So that the needle can move the exact way.
- Set up your machine to the desired settings. Set the stitch number. The smaller the number makes the stitch tighter.
- Take your fabric, place the raw edge straight onto the machine, and sew with the stitch down. This stitching keeps the thread from coming off the ends.
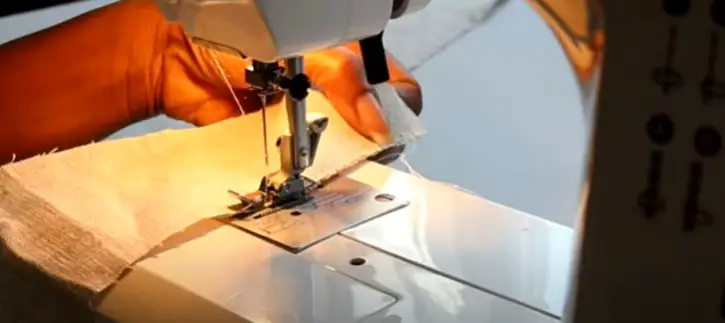
How to Use Zig-Zag Stitch as an Overlocking Stitch
We use overlock stitches when we want to protect the raw edges of the fabric. You may see that your fabric started to fray. To eliminate fraying and get a nice finishing, overlocking stitches are barely needed.
- Choose the stitch number from the machine chart.
- We are going to use a zig-zag stitch with normal settings here.
- When you are using the zig-zag stitch, the needle will pulse from right to left. So, start the needle in the down position.
- Then just slide the fabric under the foot when it is raised, line the fabric, bump it up against the needle, and set the needle on the edge.
- Start the machine, start with a slower speed.
- Set up the fabric tension correctly if needed.
- After completing the stitching, trim off the fabric edges. You may use a scissor too. Because these edges are going to push some material.
So, that’s the simple process of making a gorgeous overlocking stitch.
How to Finish Raw Edges of Fabric
A good finish can make your fabric cleaner and give it a longer lifetime. Here we discussed five techniques to finish the raw edges.
Using a Serger
- Serge on the raw edge, and align the cut edge using the serger blade. Then shave off some threads.
- Now turn up the edge, press, and stitch.
Zig-Zag (Without Serger/Overlocker)
Most common method! Here you will need fabric and a sewing machine.
- On the machine and set the zig-zag stitch option of nearly 1.5 lengths and 3.5 widths. (setting may depend on machine brand and fabric quality). You should practice on a ruff material first to get the perfect zig-zag.
- Take the perfect seam allowance and start sewing.
- After stitching the zig-zag, trim the excess fabric.
- Then sew the edges and stitch the seams.
Using Pinking Shears
Maybe it is one of the simplest finishing styles! Pinking Shear bears a serrated blade. And this blade stops the fabric from fraying out. This method is generally used for those fabrics which are not washed so often. But not recommended for loose fabrics like linen.
- Just the things required here are only fabric and a pinking shear.
- Sew your seam. Use the basic machine and the zig-zag stitch.
- Finally, clip that along the edges (by using the pinking shears).
Turn and Stitch
One of the oldest ways of stitching! It is comparatively comfortable and you will need so many threads.
- Sew your seam using the machine. Take the right allowance.
- After completing the seaming, turn the edges under the allowance.
- Make the edges folded on both sides.
- Press it and do a straight stitch.
Mock Overlock
You can find this overlock stitch in almost all sewing machines. This works great for small projects. Here an overcast foot is required. You can use the all-purpose foot too.
- Sew using the overcast stitch. Sew both seam and zig-zag.
- Cut off the excess fabric.
Hong Kong or Bound Seams
What is the Hong Kong Seam?
It is a system of binding seams by simply using bias tapes.
Where Is It Used?
Bound seams add luxury to both unlined and lined garments. To finish the raw edges on an unlined jacket, coat, skirt, or tailored coat, the Hong Kong seam is best. It is also perfect for heavy woven.
Instruments Needed
- A bias tape (nearly 1-inch width)
- Sewing machine
- Scissor
- Fabric
Actions Needed
It is time-consuming but too simple.
- Take a bias tape of a few yards. The length of the tape will depend on your seam length. Take an extra one or two inches.
- Press and keep it flat on the fabric.
- Take the right sides of the seam allowance and fix them with the tape together. Then start sewing at 1/4”.
- Now take the binding tape to the other side, wrap around the full seam allowance, and then press the tape heads.
- Then stitch. Start from the right side. Repeat it for other seams.
FAQs (Frequently Asked Questions)
Can I Overlock without an Overlocker?
Use mock overlock stitches. Generally, most of the machines available in the market bear mock overlock stitches. You will find their name as overedge or overcast stitch in the user manual. They do their jobs well. But it is considered a little bit slower than a real overlocker.
Is it possible to serge by hand?
Follow these steps.
- Find the perfect needle for you. Choose the thread color according to the fabric.
- Tie a knot at the end of the thread, insert the needle head, and loop the thread.
- Now pull your thread, and keep the thread as flat as possible.
- Repeat this process again and again.
Conclusion
Not so tough doing most of the stitches without the serger. Just follow the quick steps described here and make your normal sewing machine like a perfect serger!
Leave a Reply