Thread guides may vary from one sewing machine to another. Since most of them come with similar parts, the threading experience is almost identical. Yet, the different alignments of the machine part cause each threading process to be somewhat distinct.
That said, below is a comprehensive guide on how to thread Lil Sew and Sew with the portable machine. So, let’s dive in straight.
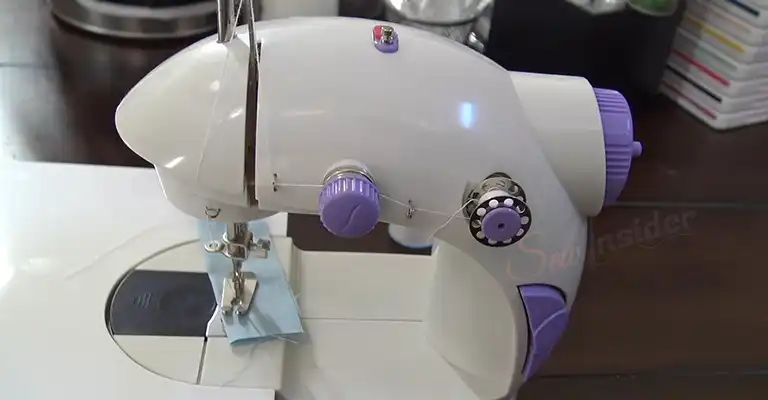
How Do You Thread a Lil Sew & Sew
Follow the steps carefully to get the best results while threading with your Lil sew and sewing machine
Step 1: Upper Thread Spindle Threading
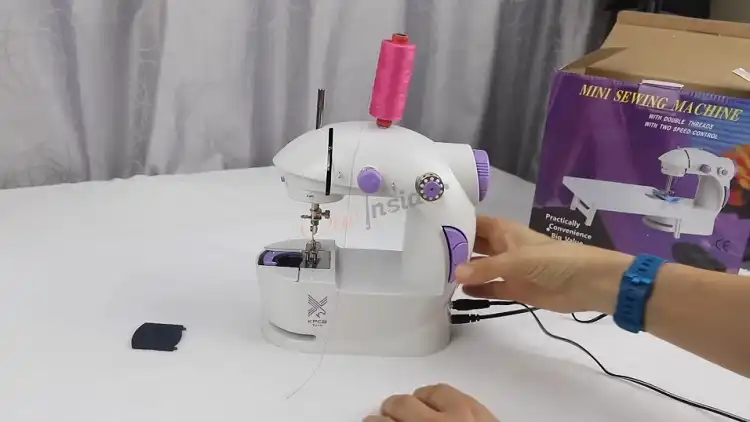
There is an upper thread bobbin spindle on the right side of the machine and a threaded spindle at the top of it. You can start threading from either.
If you wish to start from the upper thread spindle, pull the pin that comes with it out. Make sure you do not lose the spring that provides the tension to help keep the pin and bobbin in place. After that, place the bobbin spool of thread inside and push it back into the hole.
Otherwise, you can keep a spool thread on the top thread spindle. And the other threading process is similar to the upper thread spindle.
Step 2: Tension Disk Threading
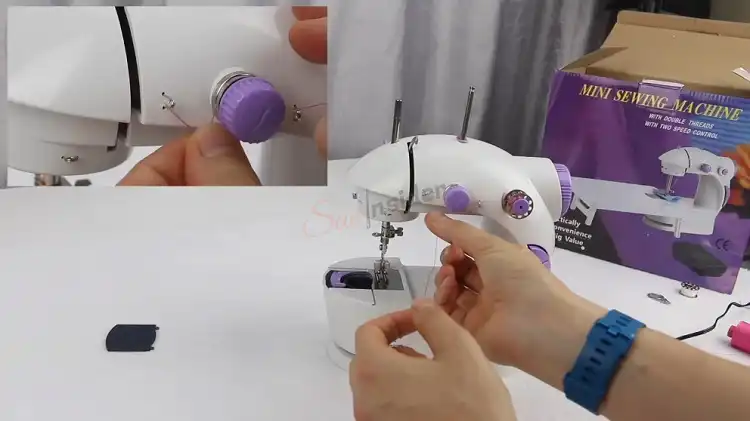
There is a tension disk between two thread guides in the same line of the upper thread bobbin spindle.
First, pass the string through the first thread guide from right to left. Next, the thread needs to go into the tension disks. So, pull the yarn down to set it perfectly between those tension disks. Then, pass the string to the following thread guide from right to left.
During the process, don’t let the yarn get caught on anything.
Step 3: Threading through Thread Guides
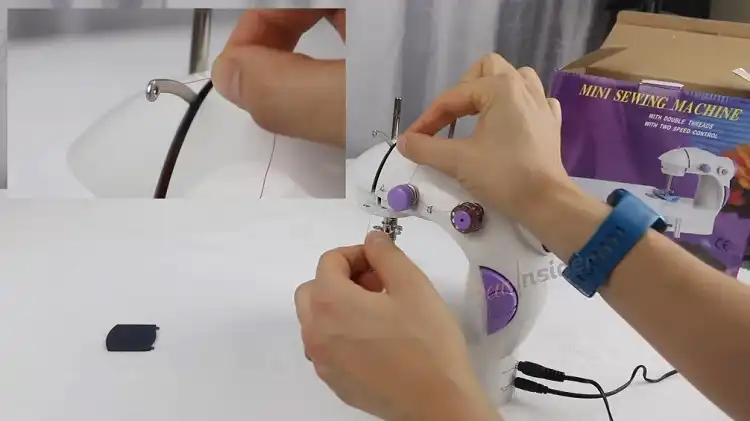
The next thread guide is on the take-up liver. So, pass the yarn through it from right to left, just like the previous step.
There is another thread guide through which the yarn has to pass from top to bottom. And the last thread guide is on top of the needle bar, which also requires a top-to-bottom string pass.
Step 4: Needle Threading
The last part of threading the top of the sewing machine is putting the thread through the needle. So, first, confirm that the needle is in the highest position. If not, try to adjust it by spinning the hand wheel.
After that, thread the needle from left to right. You can use a needle threader also to avoid struggle while threading the string.

Step 5: Bobbin Loading and Setup
To load the bobbin for the bottom thread, you need to have your bobbin filled with string in a clockwise direction. And then, drop the bobbin into the Lil compartment.
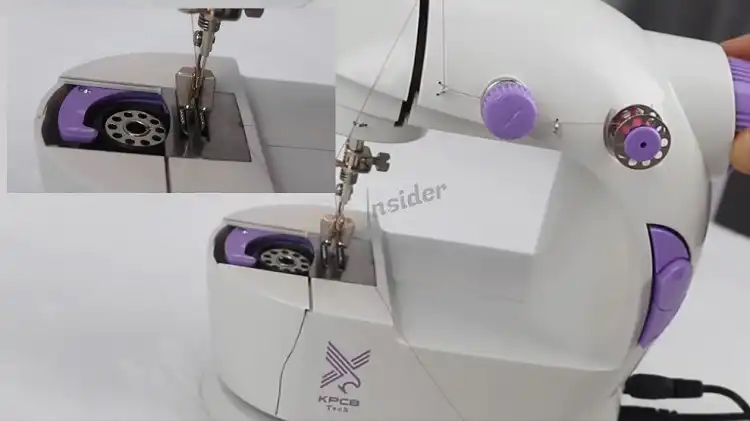
After placing the bobbin into the holder, turn the hand wheel towards you. This process will take the needle down. When the needle comes back up, pull the thread gently toward you. And that should bring the bobbin thread up as well.
Next, pull the thread out carefully and put it under the pressure foot and towards the back. Finally, your machine is ready to sew.
Step 6: Sew Happily
Before you start sewing with your Lil sewing machine, here are some tips that may help you.
When your machine is all threaded up, put the fabric under the pressure foot and lower the pressure foot down. But before placing your foot on the foot pedal, turn the hand wheel toward you a few times just to put a couple of stitches into the fabric. Doing so helps hold the thread.

The machine lacks a reverse function. So, if you want to sew in the opposite direction, put the needle down and lift the presser foot. Then, swivel the fabric and lower the presser foot to start sewing.
Frequently Asked Questions (FAQs)
Do you need both an upper thread and a lower thread to sew?
Sewing machines require both upper thread and bottom thread to form a stitch. The lower one has to be in a small bobbin stored underneath the pressure foot while the upper one gets threaded with the needle. So, a stitch will form when turning the associated hand wheel.
Why won’t my sewing machine pick up the bobbin thread?
Generally, it depicts a faulty threading process. If the bobbin gets displaced from its holder, you may face such a problem. Moreover, when you turn the hand wheel counter-clockwise, it also provides you with a similar output.
Final Words
The threading process using a Lil Sew and Sew can seem tricky initially. But if you remember a few tricks, it will be smooth sailing. For example, don’t miss the step where you pass the thread around the tension disk, or the stitches will end up loose. Also, beware of misplacing the bobbin.
Leave a Reply