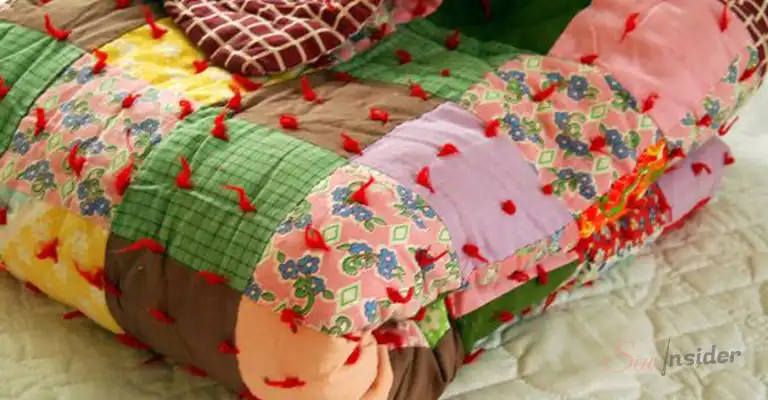
What is the earliest memory you can remember? I bet it would involve you snuggled underneath a quilt with fluffy ends.
The final part of finishing it would be tying the quilt. You would have knots placed at regular intervals all over the quilt. These knots securely hold the layers in place whenever you use or wash the quilt.

How to Tie a Quilt With Yarn
Here are the most basic steps to follow when you are tying a quilt with yarn. Even if you’re a newbie, you won’t have any problems at all.
Step 1: Things You’ll be Needing
Yarn
You would need good-quality acrylic yarn. The fluffy big yarns are not so good for the quilt. The cotton yarn would do great too.
Needle
The next thing you would be needing is a chenille needle. The size should be around 20. The quilt has three layers, so it would be easy if the needle had a sharp end & a large eye. The bigger the needle, the better you can pull through the quilt.
Thimbles
2 thimbles for the index finger & the thumb. Safety for the fingers should never be put at risk.

Snips or Scissors
These are very handy when you need to cut the yarn at some points.
Step 2: Attaching the Yarn to Your Needle
The best way to attach your yarn to the needle is with a small piece of paper. At first, fold the paper once so that it can go through the needle. Then place the head of the yarn inside the folded paper. Now slip the paper through the needle.

Step 3: Deciding Where You Want the Knot
It doesn’t matter where you want the knot to be. You can put the knots on the front or the back of the quilt. It works both ways. It comes down to your preference.
Step 4: Marking the Spots
You need to mark the spots where you want to place the knots. A disappearing pencil or wash out marker would do the job. By marking your areas, it would be easy for you to navigate the areas along with the quilt.
Step 5: Tieing the Quilt
Now you are all set for tieing the quilt. Put one hand underneath the quilt so that you can navigate the needle through the layers easily.

Insert the needle all through the three layers & pull it back up & tie the shortest amount of path possible. The distance should be no more than ¼ inch. Go through the three layers twice.
Step 6: Handling the Yarn
The yarn can make problems as the hole made by the needle is so small. So you need to wobble the end of the needle to make the hole a bit bigger. This will help the yarn go through the layers of fabric easily. Pull the needle while pinching the backside, this should do the job.

Step 7: Tieing a Knot
After you have pulled the thread, it’s time to knot. The best knot for quilts would be the surgeon knot. Take the right thread over the left thread & go under like doing show lace. Repeat the same thing again & cinch it down tight.
Pick your thread up & again let the left thread go over & around like before. Then cinch down. Viola! You have completed the surgeon knot.

Step 8: Trimming the Tails
After you have knotted the quilt, you have to trim the tails. Pick up your snips or scissors & trim the tails of the knot to ½ inch.

Step 9: Continue Knotting
Now it’s the time to sit back at a comfortable place & knit away. The more you practice the faster you will be able to do the job. Make sure you are aware the whole time because the needle might stick into your fingers.
FAQs
How far apart should the ties be?
Generally, this depends on the wadding you are using for the quilt. The looser the wadding, the closer the ties need to be. It’s better to tie a little closer as it puts less stress on one individual tie.
What kind of needle is better to tie a quilt?
If you are confused about what needle to use, just find a large needle. The larger the needle, the better it can penetrate through the layers of waddings.
Conclusion
Even if you are a new quilter, tieing a quilt can be so much fun. Giving different sorts of knots in the pattern makes the quilt so much more lively. The options for tieing a quilt can be better left to your imagination of what you can do. The best thing is to practice new things more & more.
Leave a Reply