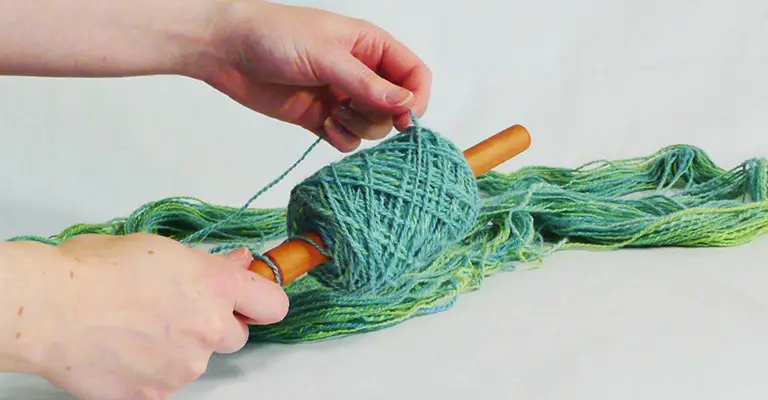
Nostepinne is a Scandinavian word that denotes “nest-stick”. It is also known as nostepinde or nøstepinde. In fiber arts, it is important. We use this tool to wind a center-pull yarn ball. You can employ this void of changing the yarn twist!
It’s evident that you are looking for the know-how in detail. Let us assure you that you have landed on the right web page. And we are going to provide you with a step-by-step guide in this regard. Are you prepared to grab them?

Okay, here we go!
How to Use a Nostepinne?
You had better come up with a way so that you can use both ends of your Nostepinne. How is that? Well, allow us to show below!
Step One
It would help best to start by looping some yarn around the top of the handle. That means you will have to create an inside end of your yarn. It will help you track your yarn package. Generally, in order to make yarn from the finished package, we use this end.
Alternatively, you see, there is a grove at the end of the nostepinne. Now you need to attach your yarn at that end. Then wrap in the grove once or twice, and afterward, put an ”up-side-down loop” in the yarn. This will help secure it.

Step Two
Now take the yarn down to the middle of the nostepinne from the handle or the end. Then start wrapping the core. You have to perform it by making consecutive wraps side-by-side. We recommend 1.5 inches of the wrap.


Step Three
Allow us to assume if you are a right-handed person. Then it would help best to hold the nostepinne in your left hand and work the yarn in your strong -hand. And in the case of being left-handed, just do the opposite. Or, if you feel comfortable, you can take any position you want.
Imagine, during step 2, you have created half of an “X” across the consecutive wraps. Now take the yarn diagonally back towards the other end at the end of your last wrap there. Now it’s time to come around the shaft with a half wrap at this end. Then take the yarn back up to the other end. You will be making the second cross of the “X”, alright?
Now keep repeating this through coming around the shaft with another half wrap at this end as well as taking the yarn back to the other end. And 8-10 times repeating this process will turn into an “X” pattern on the nostepinne.
Step Four
At this phase, you have to rotate the nostepinne in your hand in a small amount. It would help follow the “X” pattern to ensure this amount. This way, you will get a gradual increase in the X pattern. Every new pattern will slightly offset from its predecessor. The pictures below shall help you visualize better.


Step Five
Then what to do to help your yarn package ultimately? Well, you have to add additional wraps and increase the wrap’s length. After completing the half wrap, put the yarn at both ends of the developing package on the nostepinne’s wood.
It would help the package grow lengthwise. And with the extension of the yarn package, you will be able to shape it as you want. Now having finished, you need to slide the package off the nostepinne. At the same time, it would help best to keep track of the center pull end.
So these were the steps. You may alternatively go through the clips below. This one is ”more explained one”, might be helpful for you.
Frequently Asked Questions
How long is a Nostepinne?
Answer: Normally, a Nostepinne is around 10 to 12 inches long.
What is Nostepinne made of?
Answer: Generally, a Nostepinne is made of wood, around which you can wind your yarn. Most of them come in a decorative and ornately carved form.
How do you find the center of a ball of yarn?
Answer: Well, you need to go to the ball’s opposite end from which the outside’s end got tucked. Then get your thumb in and index finger of each hand. You may choose any skein portion, and after choosing, you need to compress the skein between your fingers until they meet. Finally, try to feel the core, then pull out the end attached.
To Sum Up
The use of nostepinne is crucial for many. It may seem simple, but you have to master it. After all, these things are a matter of struggle. And after getting skilled, it becomes a matter of joy.
Well, that’s for today. Wish you happy needlework and a stroke of good luck! Have a good day!
Leave a Reply