Many of us like to buy yarn weave crafts. But what if you do make them at home all by yourself? Some of the most basic ways are using a loom, tree branch, macrame, etc. In the beginning, it may look intimidating but in reality, it’s really easy to do in just a few steps.
How To Weave Yarns Patterns
You can get into weaving with some easy techniques. Let’s take a look at a couple of the most basic ways of weaving.
Using Loom
Using a loom is the most basic way of weaving yarn. Generally, they vary in size. But for beginners, it’s better to use a small loom to get the hang of it. Bigger ones are generally used by professionals or people who have been weaving for a long time.
Installation
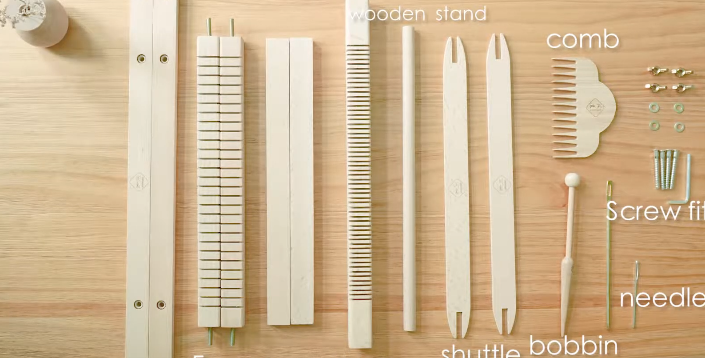
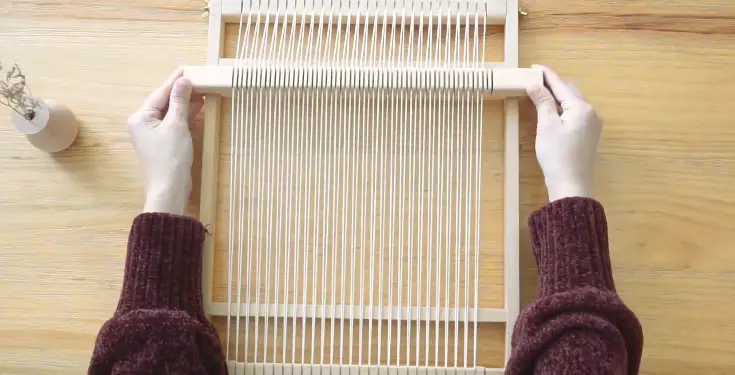
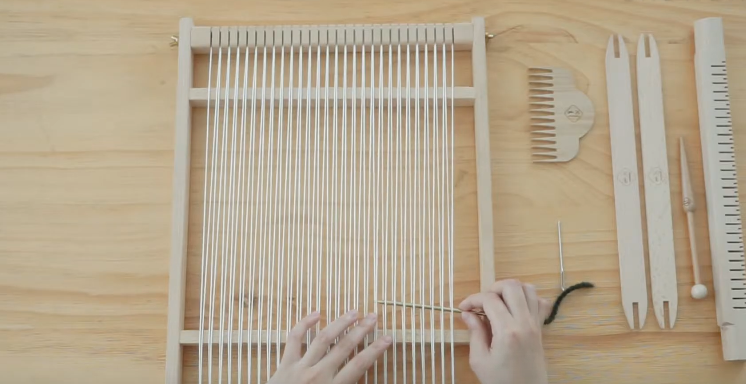
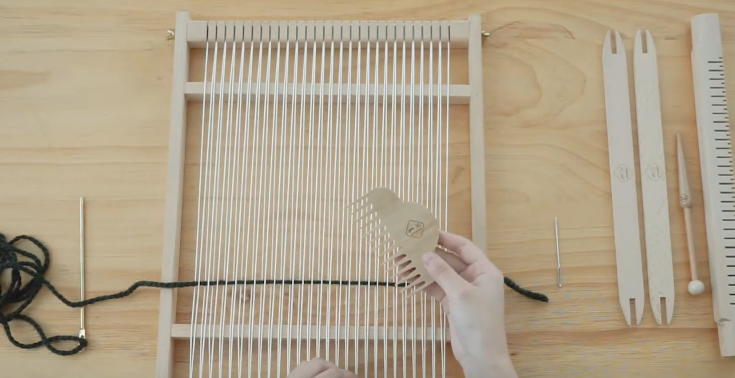
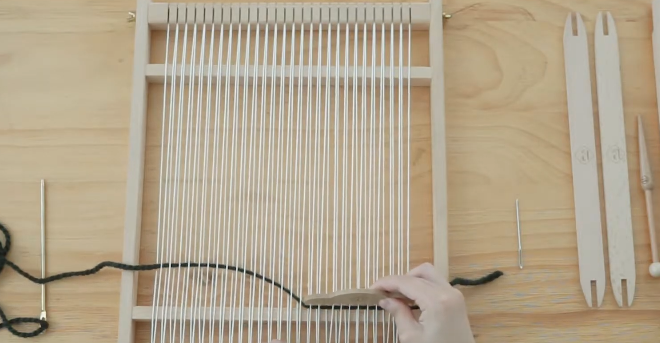
The looms generally come as separate parts so first you need to install the parts to get them ready for weaving. After the installation, it should have two layers of threads called warp with the heddle bar in between. The working yarn is weaved inside these two layers.
Start Weaving
In the next step, you need to thread the yarn in between the warp. There are three tools you can use to thread the yarn across the warp- the needle, the bobbin, and the shuttle.
Attach the yarn to the needle and thread it in between the warp. Remember to change between the layers after passing the warp once.
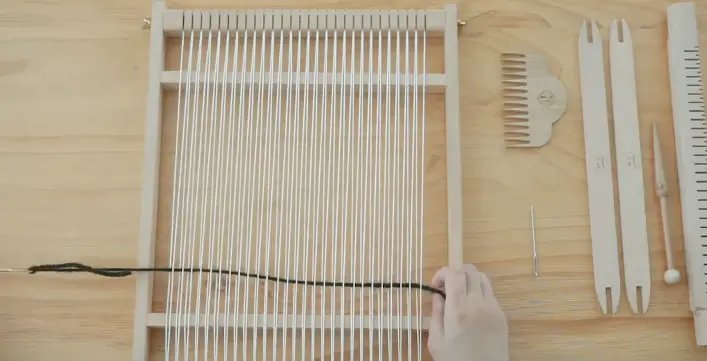
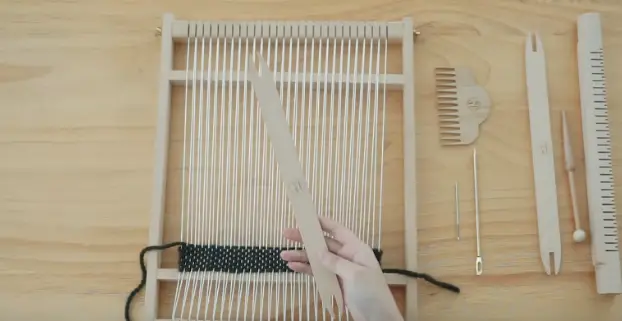
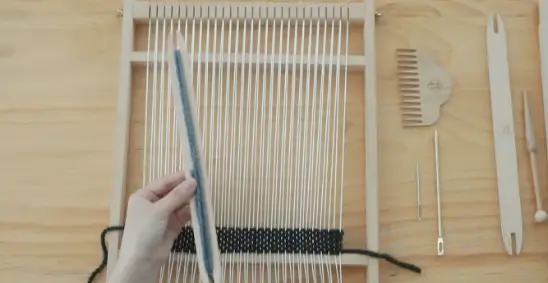
For the shuttle, the yarn goes into the slits on two ends and around the length. It is used to bring the yarn across large areas.
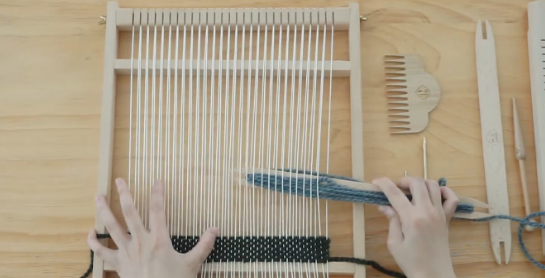
On the other hand, the bobbin is used to bring the yarn across small areas. The yarn is wrapped around it and then weaved in between the warp.
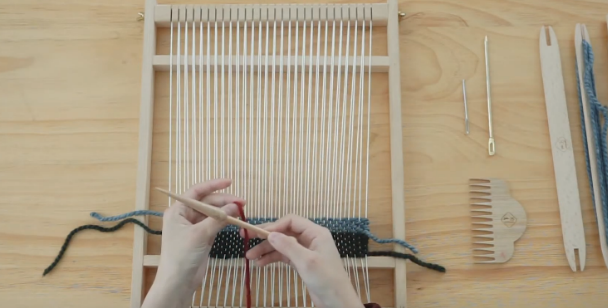
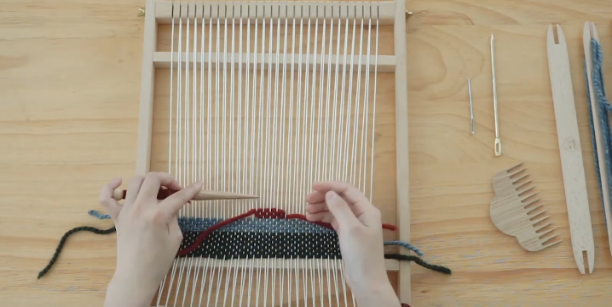
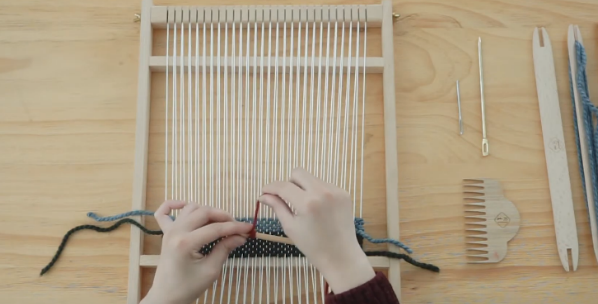
The comb is for carding the yarn neatly at the bottom so the patterns are nice and clean.
Using Tree Branch
Using tree branches is another way of weaving creative yarn crafts. Also, this is a pretty nice project for beginners.
Collect Supplies
Not all tree branches can be used for yarn weaving. Try to look for branches that are shaped like the letter “Y” or “V”. You’ll also need yarn, scissors, needles, and a fork for supplies.

Creating Warp
You can make two kinds of warp on a tree branch-one layered and two-layered. One layered warp has only one layer for the yarn to weave in. So, the yarn is weaved in the same layer by going back and forth. As for the two-layered warps, the yarn is weaved in between the two layers like a normal loom.
To make a one-layered warp, tie the thread on one side of the branch. Then pull it across the other side and wrap it around once. Then again pull it to the other side and wrap it from inside over to the back. After that, go to the other side again. Continue this action until the whole branch is wrapped.


On the other hand, to make a two-layered warp start the same way by tying a knot on one side. Then pull it to the other side and wrap it around twice. So, the thread will be outside. then pull it to the other side And, continue the process until the whole branch is covered.


Weaving
After the warp is done, take the needle and start weaving the yarn. Weave back and forth to cover the whole area. You can also add different colored yarns for making patterns and designs. After weaving the yarn, use the fork to card them neatly to the edge. Continue the same action until the whole warp is weaved with yarn.


How To Weave Without A Loom
Most weaving techniques use a loom to weave yarn. However, even if you don’t have a loom around, you can still make yarn crafts by weaving without a loom.
Continuous Macrame
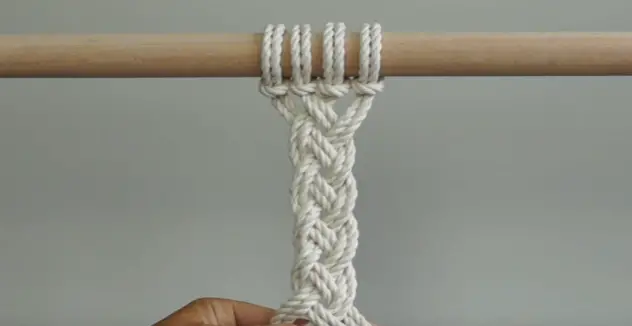
For doing a continuous weave macrame you will need chunky rope yarns, a wooden stick or thin rod to hang the yarns from, and scissors.
Hang The Yarns
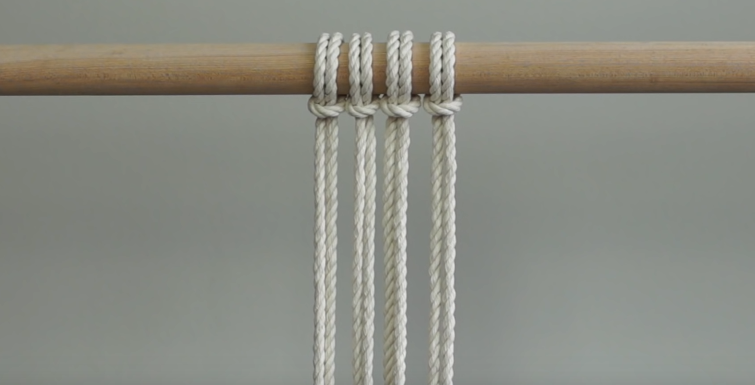
First of all, take 4 pieces of same-sized yarns. Now make head knots and hang them from the wooden stick. Make sure to maintain a slight gap between the threads while hanging them. The yarns should be hanging as a group of two treads.
Start Weaving
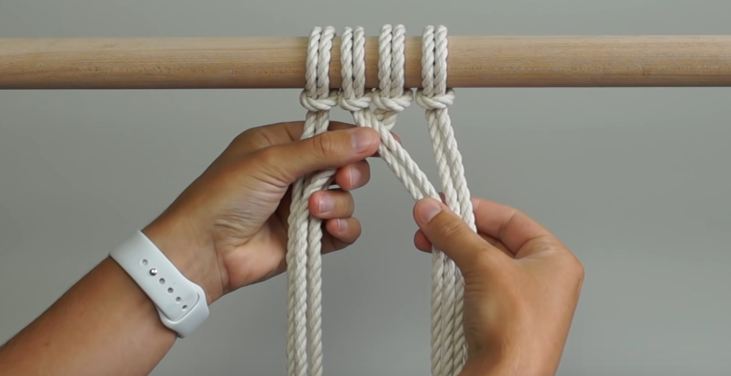
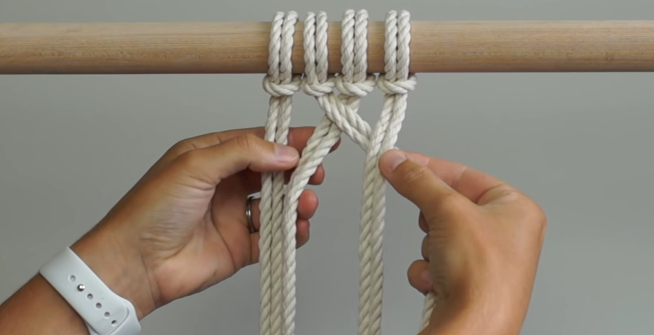
Let’s call each group of strands group a, group b, group c, and group from left to right. Start by taking group b in front of group c, group d in front of group b, group c in front of group-a, and finally group-a in front of group d.
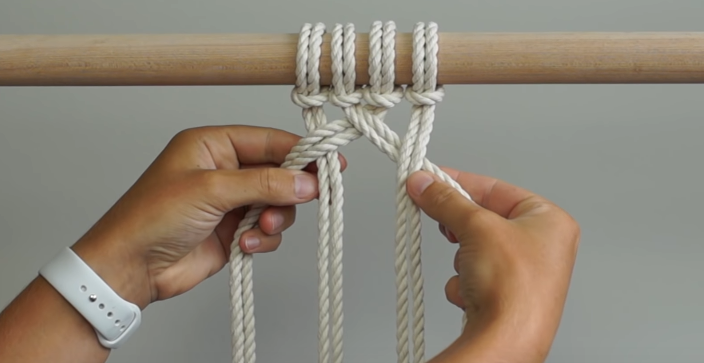
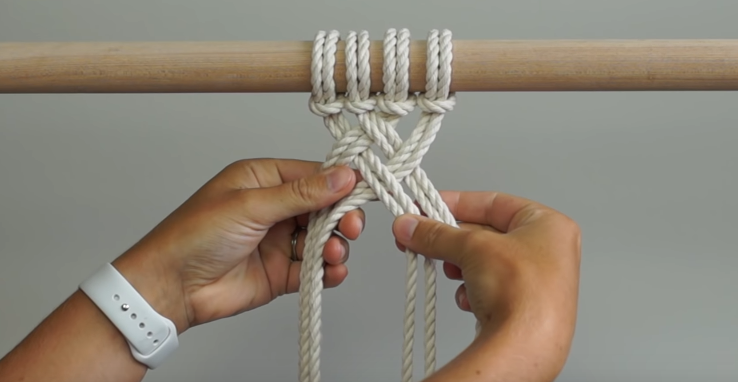
Continue Weaving
Keep weaving by bringing group b from the right in front of group a and group c from the left-behind group d. Continue this process to make this same pattern over and over until it reaches your desired length.
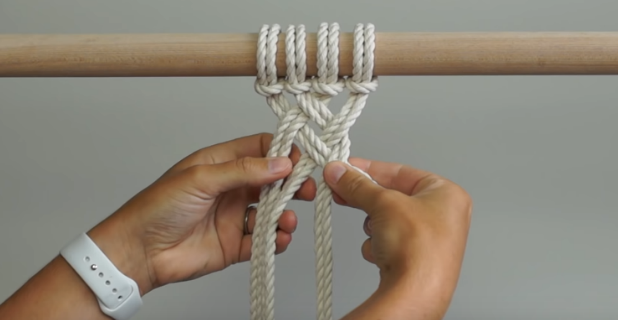
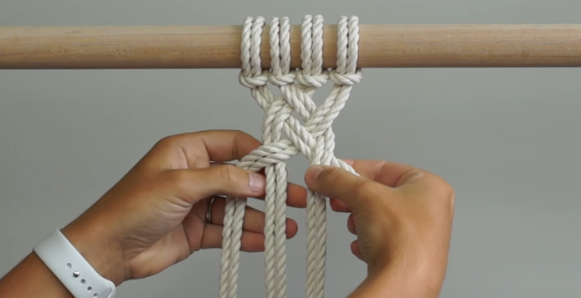
Adding Yarn
The previous processes show the technique of weaving with 4 groups of yarn. However, if you want to work with more groups you can add more. Then just start making whatever pattern you like until it has reached the desired length.
Weaving Techniques
There are a couple of weaving techniques that a beginner can try out. They are mostly plain weave or built off plain weave so they are rather easy to do as well.
Plain Weave
Plain weave is the basic weaving technique where the yarn threads are added in a strain line in the warp. So, the patterns and designs generally turn out to be straight in this technique.

Angled Row
A very effective tip for weaving wavy rows is weaving a plain line first. Then push them into the shapes that you want. Then you can continue the process or add in new colors to fill in between. The angles don’t need to be specific, just do whatever works for you.

Side Fringes
Side fringes are plain weave with extra yarn hanging by the sides. To create fringes, decide how long you want your fringes to be. Then cut the yarn threads accordingly so that the fringes are of the same length on both sides.

Weaving Patterns
Stripes
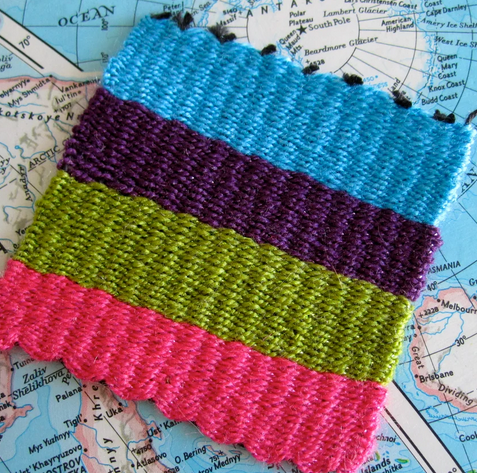
Stripes are one of the easiest patterns to make. It’s done by using two different colors of yarn. The weaving procedure is the same as plain weaves. The trick is weaving one row with one color, the next row with the other, and repeat.
Oval Draft
The oval draft pattern also needs only two colors. Here, the first row is weaved with one color, the second row with the other color, then again, the third row with the first color. This makes the middle row looks like an oval pattern.
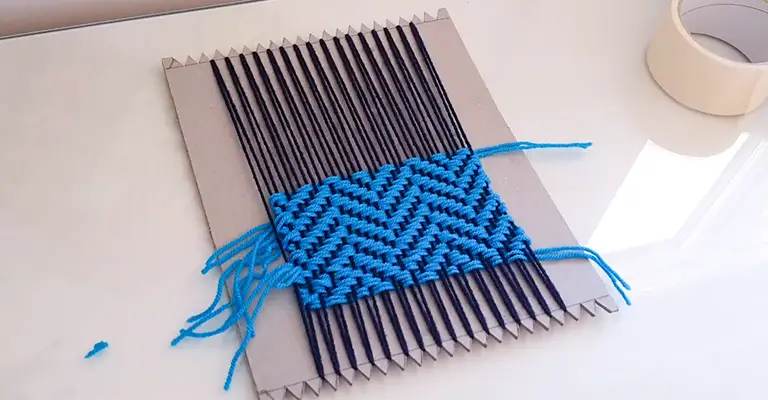
Cardboard Weaving Projects
For cardboard weaving projects you will need a cardboard loom and some other supplies including yarn, needles, and scissors.
Make Your Loom
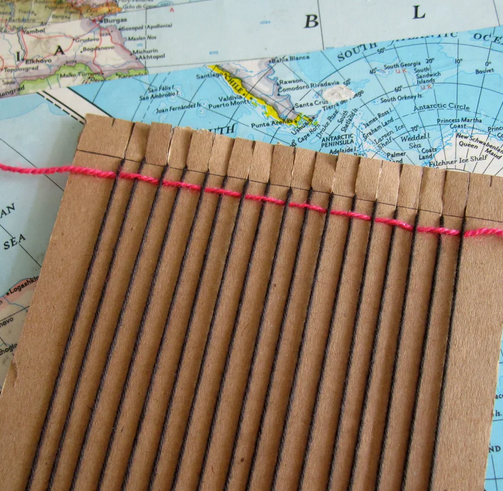
Firstly, take a cardboard and cut it to the size you want the project to be. Now draw a ½ inches line on the top and bottom edges of the board. Then cut notches on these two edges ¼ inches apart from one another.


Warp the Loom
Wrap warping thread on the loom by pulling them through the notches. Tape the end of the thread at the back of the loom to secure it.


Weaving
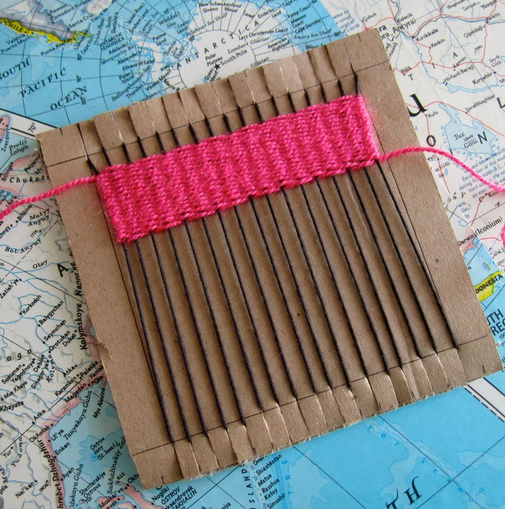
Now start weaving yarn into the warp with a tapestry needle. Continue weaving until you’ve covered the entire warp.
Finish Off
Take it off the loom and finish off by tucking the loose ends inside with the needle.

Frequently Asked Questions
Q: What kind of needle should I use?
Ans: Tapestry needles work better as they are easy to handle. Also, the yarn can go through the hole easily.
Conclusion
Like any other handcraft, weaving takes time and patience. You may not get the best result at the very first time, but don’t lose hope. You’ll get better with more practice.
Leave a Reply